Showing posts with label Cricut Elegant Edges. Show all posts

Sunday, July 24, 2011

Look what my sister made for me


Cricut Elegant Edges


To create this she used white card to cut the frame from the Elegant Edges cartridge. This frame cut can be found on page 29 in the handbook. She used the Design Studio to size the frame so the inside of the frame measured 4x6. The frame was painted and sea sponged with KaiserColour paint Marine Blue, Coastal Blue and Turquoise and sprinkled with Fairy Dust. The frame was mounted onto a shadow cut. Between the frame and the shadow under the branch cutout green card was adhered. Glossy Photo paper 4x6 was used as the base for the design. The flower are Stampin Up Scribble This stamp set. They were stamped using Memento Black ink. VersaColor Lilac 35, Green 21 and Sky Blue 38 was used to colour the stamped image. Tim Holtz Distress Ink Tea Dye was used to ink/sponge around the edges. Kindy Glitz Crystalina was used on the flowers. The birdcage, bird & droplets are Embellishment Stickers. The flowers are Kaisercraft and the flower jewels are Kaisercraft Rhinestones.
A special Thank You to my sister for thinking of me and making me this beautiful gift. I love it.

Saturday, July 23, 2011


Cricut Imagine Bubblegum Stripes
Nifty Fifties
Elegant Edges

To make the card base I used the rectangle 5:7 on the Imagine. This was printed using the pattern on page 3 of the handbook and cut @ 5. The circle pattern page 2 handbook was printed and cut @ 4.8 square and trimmed to size 3inch x 4 11/16 inch. The orange mat is core'dinations ColorCore Cardstock. The green note shape (imagine shape) was printed and cut @ 2 using the color palette (Bubblegum Stripes) also using the same color palette I printed and cut the orange note shape @ 1.8. The Happy Birthday sentiment was printed onto the orange note shape with my printer. I used Photo Shop 22 the font is 'Bliss' this was printed @ 24 pts. To make the border I used Elegant Edges and the same colors as the note shapes. This pattern can be found on page 34 in the handbook. The border and shadow was printed and cut @ 1 and trimmed at either end to fit the card. To finish the border I used a matching lime green ribbon along the top. The car is from the Nifty Fifties cartridge. This cutout can be found on page 24 of the handbook. The car was printed and cut @ 1.2. The color for the car is from the color palette (Bubblegum Stripes) except for the blue. For the blue I used RGB code R147 G200 B198. I used pop dots to adhere the Happy Birthday sentiment and the car onto the card. To finish off the card I printed and cut a 5:7 rectangle (Imagine shape) @ 4.9. using the lime green from the color palette and adhered this to the inside of the card.

Saturday, July 2, 2011

Cook Book Cover

Cricut Imagine


Kate's Kitchen


Blossom


Elegant Edges


From My Kitchen

To make the cover for the book I cut brown (Bazzill) card 10 1/4 x 7 1/4. This card was scored @ 4 3/4 & 5 1/2. I printed two full sheet of the pattern on page 44 Kate's Kitchen handbook and cut them the same size to cover the brown card on the inside and outside of the cover.

For these scallop mats. I used the oblong feature on page 65 of the Elegant Edges cartridge. The patterns are from the Blossom cartridge. The base scallops were printed and cut @ 3.2 pattern page 6 in the handbook. The smaller scallop was printed and cut @ 3 using the pattern on page 7 and page 9. The newspaper mat was printed and cut @ 2. 4 times using the layer feature from the mixing bowl and rolling pin. This pattern is on page 10 in the Kate's Kitchen handbook.

From My Kitchen Recipes was printed and cut @ 1.5 using the color palette from Kate's Kitchen. The kitchen mitt was printed and cut @ 10.5. This mitt is a layer from the pattern on page 3 Kate's Kitchen handbook. The apron was printed and cut @ 2. pattern on page 9. Let's eat Dessert First was printed and cut @ 2. To print and cut the shadow I used the print and changed the size to 2.1 and selected dark brown from the color palette. This print is on page 31 in the handbook. Made with 100% Love was printed and cut @ 1.5 pattern page 32. The Dee-licious tag pattern page 27 was printed and cut @ 2. using the layers. The plate & cookies layer page 10 printed and cut @ 3. The bowl and rolling pin layer page 10 printed and cut @ 1.3. The wooden spoon layer page 12 was printed and cut @ 1.5. The kitchen canisters layers page 6 was printed and cut @ 3. The gingerbread was printed and cut @ 3. layer page 20.
The element recipes was cut twice adhered together for a faux chipboard effect. I used pop dots to adhere the elements Let's Eat Dessert First, the Dee licious tag, the plate and cookies, the kitchen mitt and under the left side of the element Made with 100% Love. All other elements were adhered flat to the book cover using a Zig 2 Way Glue Squeeze & Role pen. To adhere the cover onto the book I used high tac tape.

Tuesday, June 28, 2011


Cricut Imagine JT-Elegant Edges-Printing 101
Scrapbook layout titled Hello Cocky

Base layer full sheet printed pattern page 39 of the JT handbook. Using the Elegant Edges cartridge I selected the Book feature cut on page 25 (handbook) and selected the pattern on page 36 JT handbook. This was printed and cut @ 10. I also printed and cut this shape @ 10.2 to create a mat using dark blue from the color palette. The photo mats were printed and cut @ 4.2 using the same color. The photos are 4 x 4 inches. I used Creative Memories Custom Cutting System to cut the oval shape from the photo and to make the narrow oval frame. The scallop border page 30 JT handbook was printed and cut @ 1.5 x 2 using the pattern on page 38 JT (handbook). These scallops were cut to fit the length of the page. I printed and cut the 1.2 rectangle @ 3. using the pattern on page 34. I cut two strips approx 1/2 inch. The length was cut to fit the page. Using Printing 101 the title was printed and cut @ .7 for the word Hello. The word Cocky & shadow was printed and cut @ 1. I used the pattern on page 36 JT handbook for the title. The flourish page 12 JT handbook I used the layer feature. The pattern was changed on the last layer. I selected the same pattern I used for the scallop. The flourish was printed and cut as a combined image @ 1.8 twice. The wings were printed and cut @ 2.5 page 6 JT handbook. For this cut I used the original colors and the combined pattern. I used a scallop punch but I used the imagine to create the circles. The pattern on the larger circle is the same as the base layer. To create the wording on the small circle I used the Adobe Photoshop and the Text Warp feature. I inked around the edges of all the cuts with VeraColor 68 Atlantic. Just as a note of interest I photographed this cockatoo during a weekend stay at the beautiful Bungunyah Manor @ Mt Tamborine.

Thursday, June 9, 2011


Blossom Cricut Imagine
Elegant Edges
Heritage
Card Base- White Bazzill card 10 x 5 inches
Scored @ 5 inches and folded.

I printed and cut the pattern from page 6 Blossom (handbook) @ 4.8 x 3. One for the front of the card and another for the inside (right). For the inside (left) pattern I used the flip horizontal feature before printing for a mirror image effect. The pink daisy scallop border on the centre front of the card I used Bazzill pink card and the punch I used is from Fiskars. To create the Cameo embellishment I used the color palette from the Blossom Imagine cartridge. To create the base I printed and cut the Shadow feature page 65 Elegant Edges (handbook) @ 3.2. I also printed and cut the Oblong feature @ 3.2 using the pattern on page 8 (handbook). These two cutouts were adhered together flat. The cameo page 65 Heritage (handbook) was printed and cut @ 2.5. These two cutouts were also adhered together flat. I used pop dots to adhere the cameo onto the scallop base. I edged the frame of the cameo with Stickles Icicle and for the silhouette I coated it with Dimensional Magic. The complete cameo embellishment was adhered to the card with pop dots. The bow was tied to the strip of ribbon along the scallop border. To hold the tails of the bow in place I used Pritt Gel glue. To finish off the card I stamped Happy Birthday (Crafty Bitz) using Memento Rich Cocoa. For the inside of the card I created a journal block using the shadow and oblong feature from page 65 Elegant Edges (handbook). Shadow was printed and cut @ 3.3 the pink scallop was printed and cut @ 3.2. I used Color Box Creamy brown to edge the pattern card and the scallop cuts.

Sunday, May 15, 2011


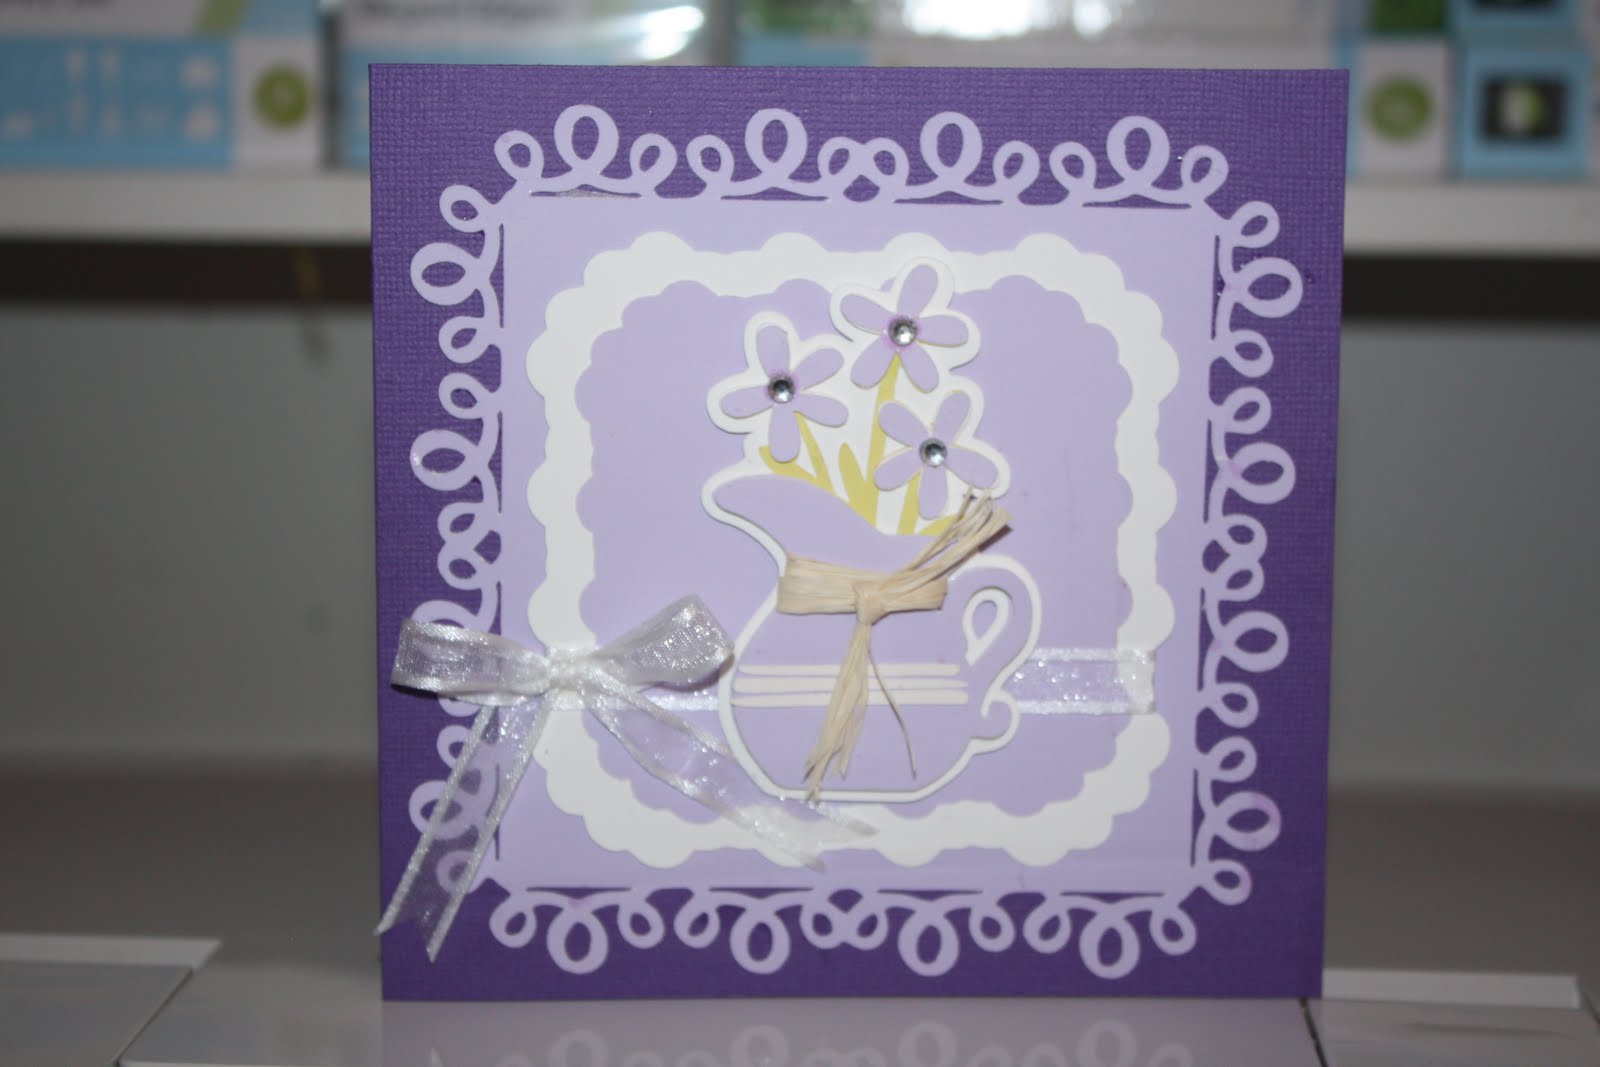
Elegant Edges & Country Life

Cricut Imagine


To make this card I used the project on page 9 (handbook) Elegant Edges but I made each cut smaller so they would fit onto a card. Base card- Bazzill Purple card 5 3/8 x 5 3/8. I used Epson PremierArt 12 x 12 Scrapbook Photo paper for the Imagine print and cuts. Using the Imagine I used RGB: 176 153 201 Frosted Amethyst to print and cut the Loops mat @ 5 page 35 Elegant Edges (hand book) and the smaller shadow mat printed and cut @ 3. The white shadow mat was cut @ 3.5. The pitcher was printed and cut twice @ 3 page 60 Country Life (handbook) using the same RGB code. I also printed a green pitcher for the flower stems. I printed Layer 1 & Layer 2 twice. Once using an off white colour and once using the Frosted Amethyst RGB code. The shadow was cut using white card. To assemble the jug I adhered the green pitcher onto the white shadow. Then I adhered one of the Frosted Amethyst pitcher onto the green pitcher. I adhered the off white flower on top of the green flower and finally adhered the Frosted Amethyst flowers on top. Faux chipboard effect. I added a clear Kaisercraft Rhinestones to the centre of each flower. For the pitcher on top I wrapped a small piece of raffia around adhered on the off white pieces from Layer 1 & 2 then adhered it on top using pop dots. I also used pop dots to adhere the assembled pitcher onto the card. The bow was adhered to the card using Pritt Gel glue. To finish off the card I printed and cut a square @ 5 using the Frosted Amethyst RGB with the imagine. Then I created a sentiment using Print Shop 22. The sentiment reads Wishing you a very Happy Birthday. I printed the sentiment onto the Frosted Amethyst square using my printer. This was adhered to the inside of the card.