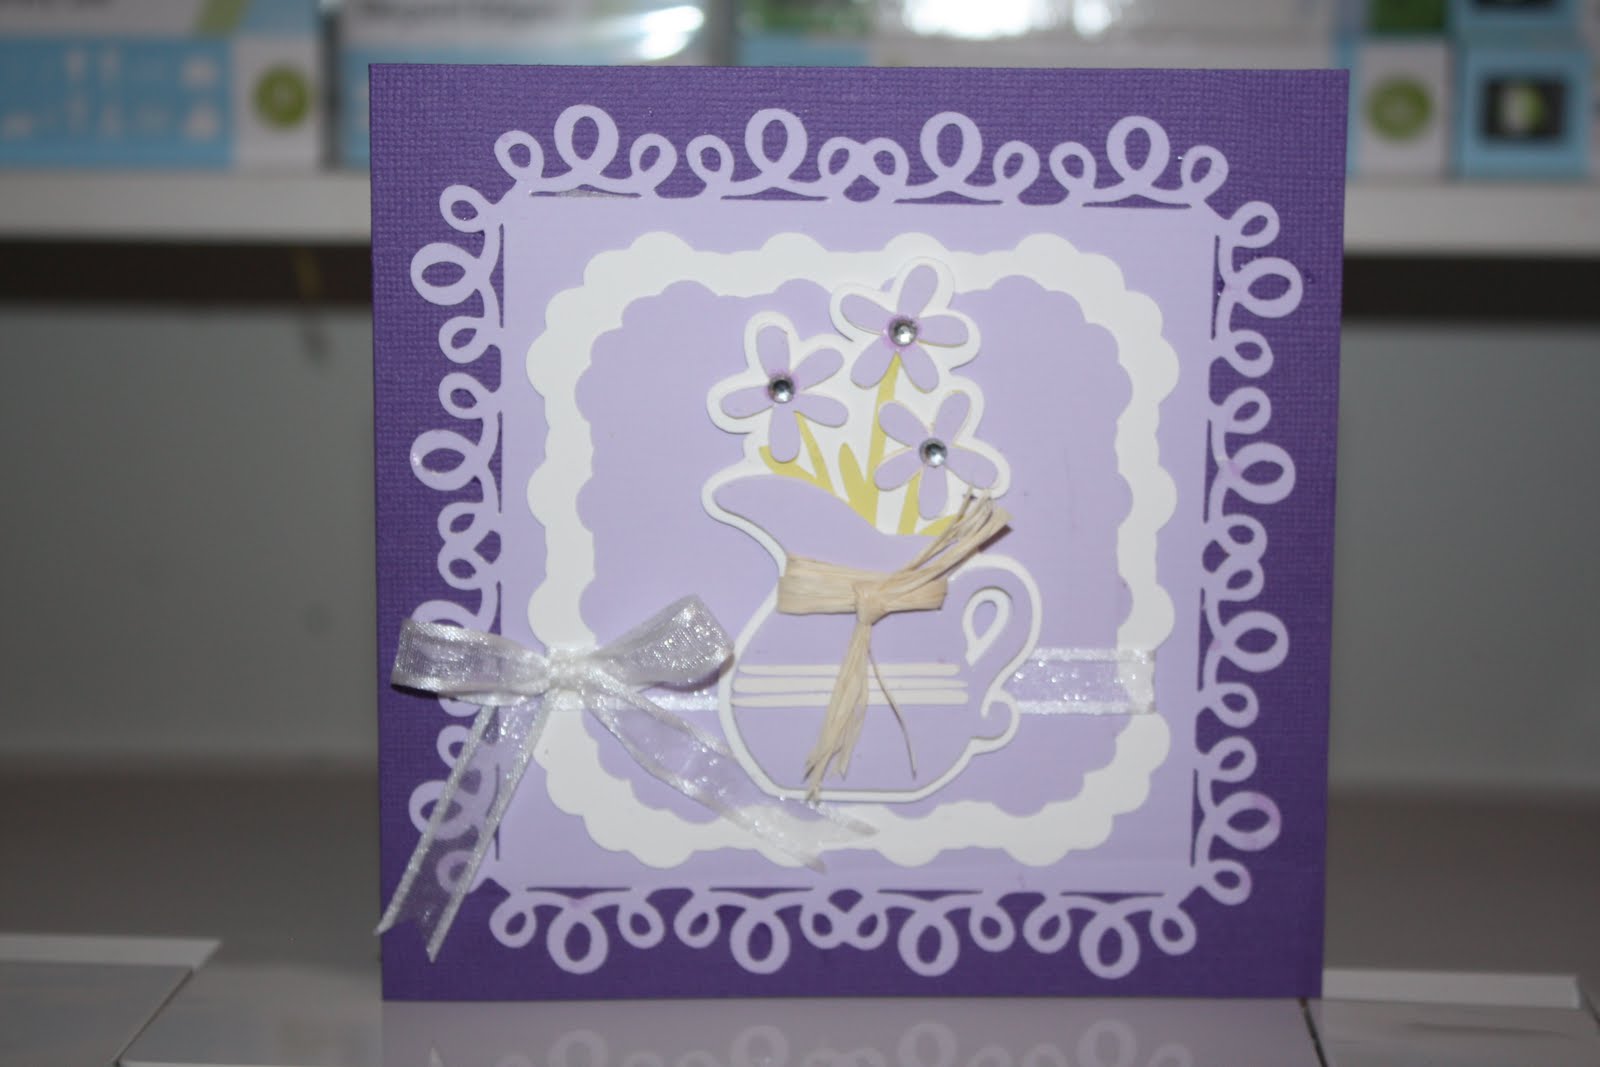
Sunday, May 15, 2011


Elegant Edges & Country Life

Cricut Imagine


To make this card I used the project on page 9 (handbook) Elegant Edges but I made each cut smaller so they would fit onto a card. Base card- Bazzill Purple card 5 3/8 x 5 3/8. I used Epson PremierArt 12 x 12 Scrapbook Photo paper for the Imagine print and cuts. Using the Imagine I used RGB: 176 153 201 Frosted Amethyst to print and cut the Loops mat @ 5 page 35 Elegant Edges (hand book) and the smaller shadow mat printed and cut @ 3. The white shadow mat was cut @ 3.5. The pitcher was printed and cut twice @ 3 page 60 Country Life (handbook) using the same RGB code. I also printed a green pitcher for the flower stems. I printed Layer 1 & Layer 2 twice. Once using an off white colour and once using the Frosted Amethyst RGB code. The shadow was cut using white card. To assemble the jug I adhered the green pitcher onto the white shadow. Then I adhered one of the Frosted Amethyst pitcher onto the green pitcher. I adhered the off white flower on top of the green flower and finally adhered the Frosted Amethyst flowers on top. Faux chipboard effect. I added a clear Kaisercraft Rhinestones to the centre of each flower. For the pitcher on top I wrapped a small piece of raffia around adhered on the off white pieces from Layer 1 & 2 then adhered it on top using pop dots. I also used pop dots to adhere the assembled pitcher onto the card. The bow was adhered to the card using Pritt Gel glue. To finish off the card I printed and cut a square @ 5 using the Frosted Amethyst RGB with the imagine. Then I created a sentiment using Print Shop 22. The sentiment reads Wishing you a very Happy Birthday. I printed the sentiment onto the Frosted Amethyst square using my printer. This was adhered to the inside of the card.

Monday, May 2, 2011


Cricut Imagine Lori's Garden


Cricut Cake Holiday Cakes


Plantin Schoolbook


Mothers Day Card, envelope and gift


The envelope

To create the envelope I printed a doubled sided 12x12 sheet of card using the pattern on page 43 of the handbook and the yellow floral pattern on page 44 of the handbook. For the envelope cut I used Plantin Schoolbook Cricut cartridge in the Cricut Imagine and used the cut only feature. This envelope is on page 79 of the handbook (Plantin Schoolbook). I also used the fit to page feature which cut the appropriate sized envelope for the card.


The card

For the base of the card and the smaller pink mat I used Color Mates Deep Fairy Tale Pink card. The base card measure 6" x 4 3/8". Floral print on top of the base card same as the pattern I used for the envelope. Small pink mat was cut @ 5 1/4x 4". Yellow floral print on top of this mat same as the print for the envelope. To make the pink lace scallop I used Martha Stewart Lace border punch. Ribbon was adhered along the lace border and a small piece of ribbon was knotted around. I used the image on page 22 handbook (Lori's Garden) for the top layer. This was printed and cut @ 4. using the layer feature. The sentiment Happy Mothers Day is from the Holiday Cakes cartridge page 70 (handbook). I printed this directly on to the yellow floral print paper using the print only feature on the Imagine. For the inside of the card I printed and cut 2 of the floral mats and one of the yellow floral mats. I printed a sentiment on to the yellow floral mat using Print Shop 22 and my printer. I printed and cut the rose on page 8 of the handbook (Lori's Garden) using the layer feature @ 1.5 and adhered this on the inside bottom right hand corner.


The Gift

To create the box for the gift I printed a full sheet of the floral print page 43 Lori's Garden handbook. This was cut to measure 10" x 8". I scored the card to help fold it to create the box. I wrapped it around the gift then I adhered it together with strong tacky tape. To create the fold at the top and bottom of the box I cut along each corner and folded each flap in then used the tacky tape to adhere each end down. To embellish the box I used one strip of pink and white card stock and edged both with the Martha Stewart Lace border punch. I scored these strips to wrap around the box. I adhered on the ribbon and tied a small piece of ribbon. The rose was printed and cut @ 1.8 using the layer feature and was adhered using pop dots.

Monday, April 25, 2011

Flower Power Chick

Groovy Times Cricut cartridge


To make this scrapbook layout I used the Groovy Times Cricut cartridge, the Cricut Create and Make the Cut computer software programme. I used Bazzill card stock for the base layer. Some of the cuts were made from left over card stock I had in my stash. Some were also cut using core'dinations ColorCore Card stock. To make some of these embellishments I've cut the shape out several times then cut out the pieces I wanted to use. For example the title Flower Power Chick I cut this out several times using different coloured card. Then I cut the individual letters out in the colour I wanted. Each of these letters were then adhered to a base cut. I also did this for the word Chick. The star burst above the piece sign was part of the cut on page 45 in the handbook. To make the 1970's I used Make the Cut software. The font I've used is 'Advert'.


Flower Power was cut @ 3" page 39 handbook-Phrase & Shadow feature

Chick was cut @ 1" page 35 handbook-Phrase & Shadow feature

Groovy was cut @ 2" page 34 handbook

Love was cut @ 2" page 26 handbook

The word Peace was cut @ 1 1/4 " page 60 handbook-Phrase feature.

The Peace sign was cut @ 3"

Star burst was cut @ 4" page 45 handbook-layer 1+shift, layer 2, main cut

(use shooting star only) Shadow feature (use shooting star only).

Individual stars layer 2 page 45 handbook.

The word Cool was cut @ 1.5" page 42 handbook-Phrase feature

Flowers page 39 handbook cut @ 3", 2.5, 1.5,

Small flowers page 39 handbook layer 1 feature cut @ 1.5"


I used pop dots to adhere the title Flower Power Chick, the peace sign, 1970's and Groovy to the layout. All the other embellishments have been adhered flat onto the base card.


Make A Wish

Birthday Card


To make this card I used the Cricut Imagine, Imagine Yummy cartridge, Birthday Bash and "Just Because" Cards.


"Just Because" Cards

From this cartridge I cut the card base and the scallop mat page 45 (handbook)


"Birthday Bash"

From this cartridge I cut the bird & balloon and the number three.


"Yummy"

From this cartridge I cut the birthday cake, the title "Make A Wish" as well as the pattern papers for on top of the base card, scallop mat. The pattern I used on top of the base card is the pink pattern on page 40 (handbook). The pattern for the top of the scallop mat is the first print on page 35 (handbook). The Color Palette from this cartridge was used for the base of the card, the scallop mat, the number three and for the bird.

The title "Make A Wish" was printed and cut @ 1 using the layer feature. I used pop dots to assemble this cut. Pop dots were used to adhere this cut onto the card. The number 3 was printed and cut @ 1.5 and was adhered flat onto the card. The bird was printed and cut @ 1.5. The pieces for the bird was adhered flat. I used pop dots under the bird and balloon to adhere it to the card. The cake was printed and cut @ 3 using the layer feature. I put the top of the cake/icing through the cuttlebug using the Swiss dots folder. I used pop dots to adhere this cut onto the cake. Pop dots were also used to adhere the candles except for the base of the candles which were adhered flat on top of the cake. All the other cuts were adhered flat to assemble the cake. The cake was adhered flat on the card. To finish off the card I rounded the corners. For the inside of the card I printed a sentiment using Print Shop 22 and printing it on the same pattern that was used on the card base.

Saturday, April 16, 2011


Mix and Match

using the Cricut Imagine


To make these Easter baskets I used Mymemories Scrapbook paper. This paper I purchased at Riot Arts and Crafts and is double sided with an adorable Easter theme print . I used the cut only feature on the Cricut Imagine to cut out the basket. This basket cut can be folded either way to whatever print you want inside or on the outside as shown in the photos posted above.

I used the print and cut feature on the Cricut Imagine to make the chicks and eggs. I used the Cricut Imagine Blossom cartridge and used the same cuts, color and size for the chicks and bow as mentioned in my previous post. For the eggs I selected four different coloured patterns from the Blossom cartridge to match the colours on the baskets ( blue, pink, yellow and green). I inked around the edges of the eggs with Vera Color 34 Orchid (pink egg), 187 Sage (green egg), 11 Canary (yellow egg) and 38 Sky Blue ( blue egg). As I will be giving these to young children I used a spot of Kindy Giltz on the chicks bow instead of a rhinestone. I also made a different handle for the basket. I used the end of the handle that had cut out with the basket as a template. I traced the end shape of that handle onto the ends of the handles that I wanted to use because there is a slit on the side of the basket where the end of the handle slips into. After I had traced the end shape I used scissors to cut the shape out. The making and the finishing touches for the basket are the same as in my previous post.


Easter Basket

Cricut Imagine Blossom

Easter 2010

Paisley

For this project the basket,chick, egg and the bows are from the Easter 2010 Cricut cartridge. The flower is from the Paisley cartridge. I used the Blossom Imagine cartridge for the patterns and colour.

The basket was printed and cut @ 5.9. The pattern I used can be found on page 9 in the Blossom handbook. I used a high tack tape to assemble the basket.

The chicks were printed and cut @ 1.5. Yellow for the chicks I used the color palette from the Blossom cartridge (darker shade). I inked around the edge of the chicks with Vera Color 11 Canary. For the chicks eye I adhered a small piece of dark pink card at the back of the cutout.The chicks are adhered to the basket with pop dots.

The bows were printed and cut @ 1. I also used the Blossom color palette for the pink color. I adhered a Kaisercraft Rhinestone to each bow.

The eggs were printed and cut @ 1. Pattern for the eggs is on page 8 (Blossom handbook).

I inked around the edge of each egg using Vera Color 34 Orchid. The eggs are glued flat to the basket. Please note that I adhered the eggs to the basket first then I adhered the chicks.

For the flower I used the image page 27 ( Paisley handbook). The flower was printed and cut @ 1.6. To make the flower I cut out 2 shapes. I printed one cut using the yellow from the color palette Blossom cartridge. The other I printed using the same pattern as the basket. For the centre of the flower I used the yellow from the color palette. To finish off the flower I threaded some coloured string through the button and tied it. I adhered the button to the flower using a glue dot. I glued the flower flat onto the handle.

To finish off the basket I scrunched up a piece of A4 white printing paper and placed that into the basket. On top I have some pink paper shred.


Friday, April 1, 2011

Imagine JT & Nifty Fifties

'Your cruisin' card


Card base 6 x 6 Bazzill cardstock (black)

Base mat JT imagine cartridge

Pattern page 42 handbook

Printed and cut @ 5.9

Inner mat (black) Bazzill card stock

cut @ 5 1/4 inch square

White mat cut @ 5 inch square and

edged - Martha Stewart Punch around the page 'Cracks'

The card title was printed and cut using the Imagine

and the JT color palette.

Phrase 'cruisin' page 46 Nifty Fifties handbook

I printed and cut the phrase 'get your kicks' page 38

handbook and used the word 'your' for the title.

For the car I used the Nifty Fifties cartridge

page 46 handbook. The car was printed and cut @ 2.5 inches.

I selected RGB code Red 225 Green 16 Blue 57 for the car body.

For the windscreen I used Red 199 Green 223 Blue 193.

I embossed the tyres using the Cuttlebug folder 'Mesh'.

The bumper for the car was printed and cut 4 times then adhered

together for 3D effect. I used the grey from the JT color palette for the bumper.

An Action Wobble was used to adhere the car to the card.

For the inside of the card I printed and cut a 5.9 square mat

using the same pattern selected for the front of the card.

I adhered a white mat cut @ 5 1/2 inch square

on top of the patterned mat. A place to write a personal message

to my son when he obtains his drivers licence.